Dry Brine Turkey Method

This was a big hit on Instagram so I figured I’d give it a more permanent spot on my website. If you are more of a video person, check out the saved story highlight “Turkey Time” on my home instagram page.
Give More Love To The Bird
How many times have you heard someone say “I don’t care for turkey” in reference to a holiday bird? Or even “the turkey is always dry!” I think holiday turkeys get a lot of hate because people have never had good holiday turkeys. A little TLC is all you need to have really great tender and juicy meat on your table!
After many years of making the Thanksgiving or Friendsgiving turkey, I have honed in on my favorite method: the dry brine, aka “salting.” This is not unique to me and in no way can I claim this method “mine” – but I tell you what, people always complement my turkey. “This is so moist!” I hear. It’s the best compliment (even if you hate that word) is it not?
Dry Brine Ingredients and Needs
A dry brine turkey involves more time, but less space. It involves more salt, but less mess.
What you’ll need:
- A roasting pan (I use this one – it was a wedding gift!)
- 1/2 cup of kosher salt per 10 pounds of bird, per day. See below to help gauge amount
- Dried basil, oregano, and thyme
- Room in your fridge for the roasting pan
- A turkey, of course!
10 lb or less: 1-2 days of brining, 1/2 cup salt per day (far less if you’re just doing breasts)
10-15 pounds: 2-3 days of brining, 2/3-3/4 cup salt per day
15-20 pounds: 2-3 days of brining, 3/4-1 cup salt per day
20+ pounds: 3 days of brining, 1 cup salt per day
Turkey Tips
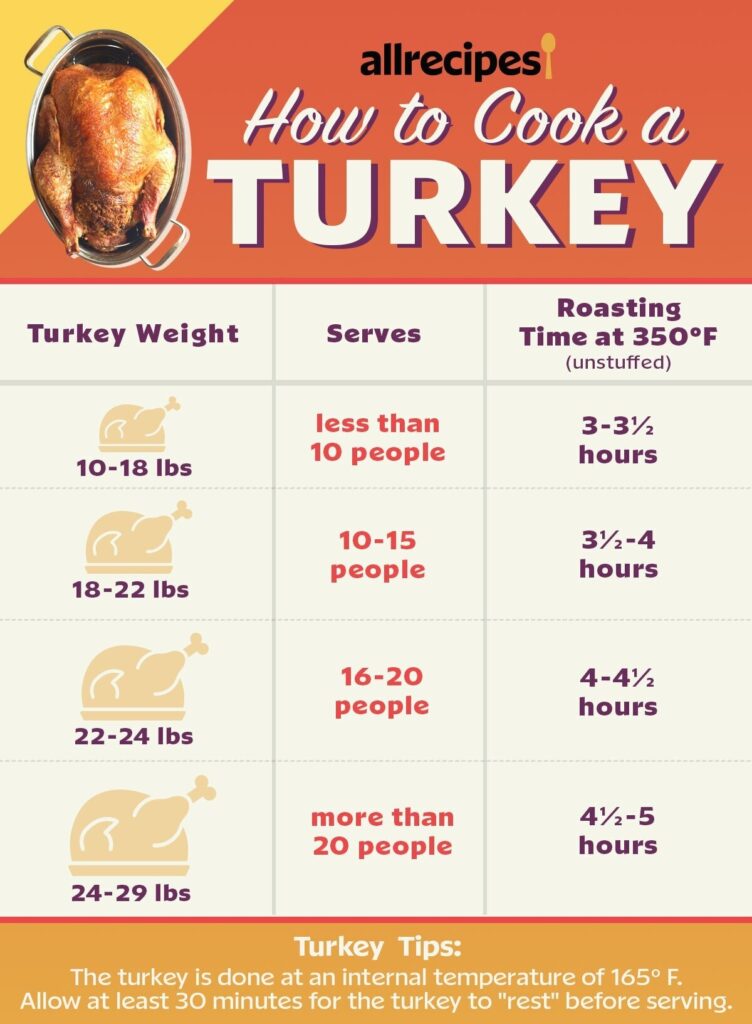
You generally want 1 pound of turkey per meat-eating person at your dinner. You know your crowd best though – if you know there will be a lot of food, you can go a little less to save on money.
Turkeys usually come frozen and they take DAYS (literally, days) to defrost! Keep this is mind when you’re planning your schedule – you may want to buy your bird up to a week in advance and let it defrost in the fridge for a while so you have time to give it the brine attention it deserves. You cannot deal with a frozen turkey – you will have a bad time.
Try to get a turkey that is JUST that: turkey. A lot of them come in a brining solution and that’s going to throw off the salt ratios you’re adding in your brine! Just read the ingredients before purchasing.
Step by Step
Step 1: Prep the bird
Remove the packaging, the giblets, and the neck of the turkey (save the giblets and neck if you want them for gravy!). Place your turkey breast side up in the roasting pan.
Step 2: Prep the salt and herbs
Clean your hands and prep the appropriate amount of salt in a bowl (you don’t want to be digging in your salt cellar with turkey hands) and add big dashes of dried thyme, basil, and oregano.
Step 3: Glove up and separate the skin from meat
The most crucial part! Using your hands, start at the neck and separate the skin from the meat all over the turkey as best you can (there are probably YouTube videos out there for this). Getting the salt between the skin and meat is what really makes this method special. We want to penetrate the raw meat, not just the skin.
Step 4: Dry Brine Turkey!
Spread the salty herb mixture all over the bird – on the skin, between the skin and meat, the legs, the thighs, the breasts, even inside the cavity. Get it everywhere. It’s a lot of salt so there is a lot to go around. Use it all!
Step 5: Back in the fridge, uncovered, and repeat each day leading to roasting day
Now, To Roast!
You covered your bird in the salt herb mixture each day, right? You have a dry brine turkey! Now it’s time to roast!
Depending on the size of your turkey, you’re going to need likely several hours to roast + an hour to rest + time to carve and make gravy.
Roasting:
- Take the turkey out of the fridge and tuck the wings back.
- Preheat the oven to 450 degrees F.
- Fill the cavity with aromatics: half an onion, garlic, celery, rosemary, half a lemon and/or orange (NOT with stuffing, please. It’s too hard to get the stuffing properly cooked to temperature without overcooking your meat. No one wants bloody stuffing. Or mushy stuffing. Just do that separately).
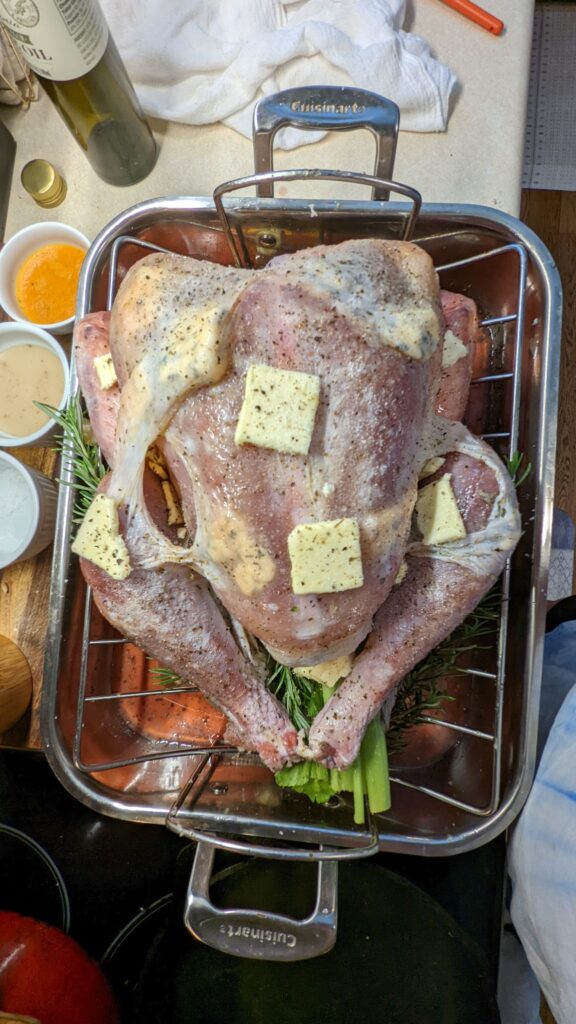
- Slice up a whole stick of butter and slide it between the skin and meat all over. Put a few pieces on top of the skin as well. Cover the bird in olive oil.
- Place it in your hot oven and roast it on the high temp for 20 minutes. Without opening the oven, reduce the temperature to 350 and set a 45 minute timer.
- Every 45 minutes: remove the turkey and shut the oven door. Baste the turkey all over with the drippings. If there aren’t a lot of drippings, just add about 1/4 cup water to the bottom of the pan, stir it about, and use that.
- Rotate the pan and back in the oven another 45 minutes. Repeat that process until the internal temperature comes to 165 degrees F all over – in the deepest parts of the breasts, the thighs, the joints, etc. Use your own instant read thermometer! The pop tab on the turkey is useless.
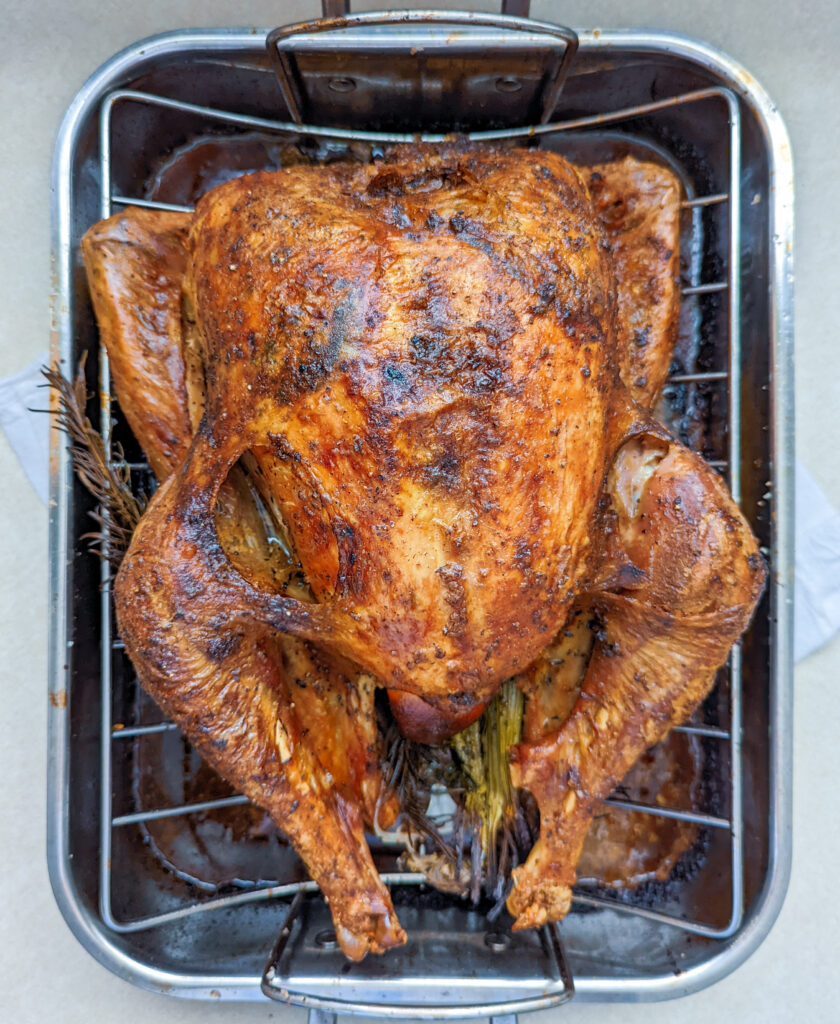
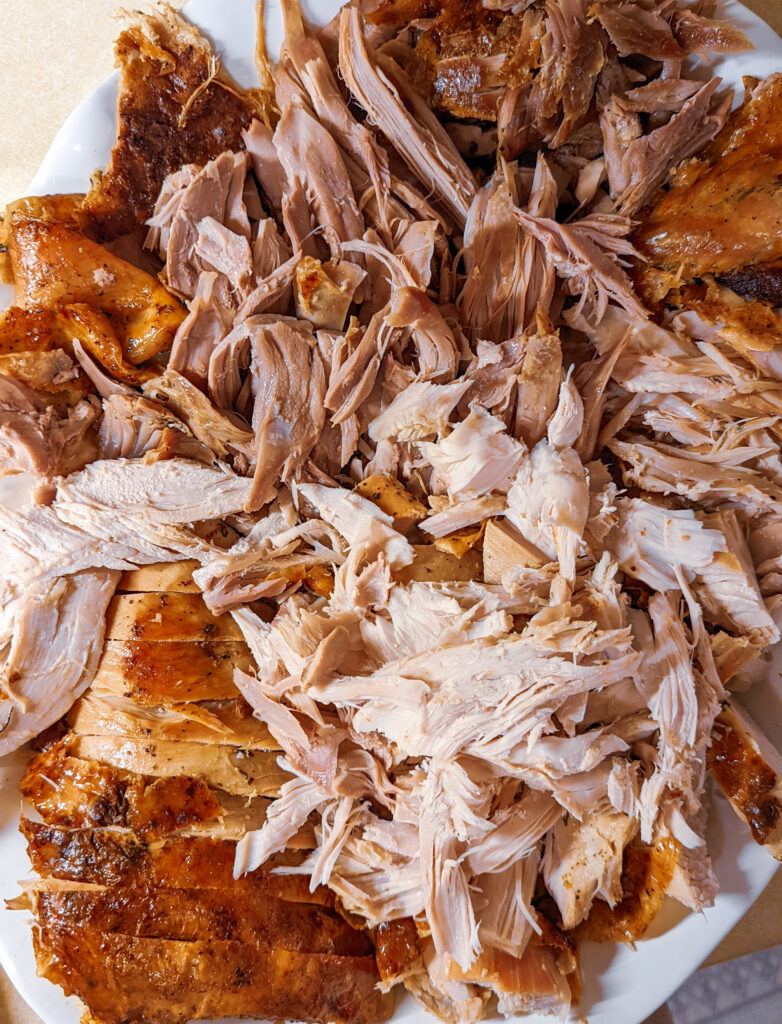
- Once it’s fully cooked, remove and let it rest an hour.
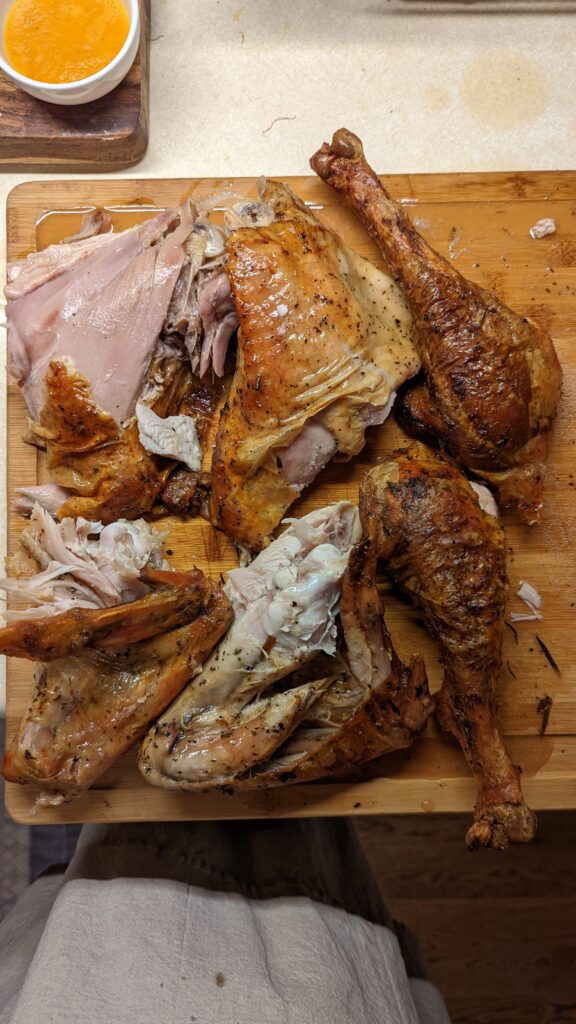
- Carve it up and ENJOY!

Try these sides with your turkey: